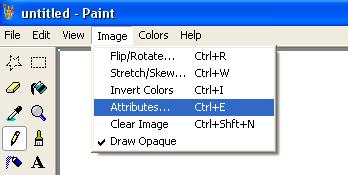
Click Image, then Attributes
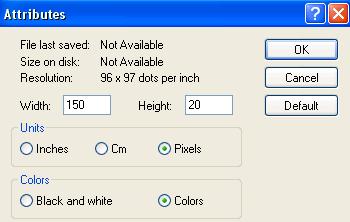
Check "Pixels" under the "Units" bar, and type the width as "150" and the height as "20"
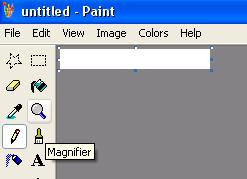
Click the magnifying glass on the left hand side ("Magnifier") and click onto the white page to zoom in.

Make a border (the black in my example) around the outside, 3 pixels wide.

With the pencil or line tool, draw short evenly spaced lines in the middle of the border, as shown.
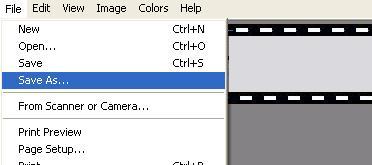
Click File, Save As..., and save as "blinkie", or something you will recognize. Remember that this is an animated file, so you will have to save everything as ".gif". You may get a pop up message saying "Saving into this format may cause some loss of color information. Do you want to continue?" Click yes.

Make the second frame of the blinkie by doing the same steps again, but drawing the short lines inbetween the ones you did previously. Save this as "blinkie1".
If you are having trouble with this step, below are templates you can use.


Now open the first blinkie frame again.
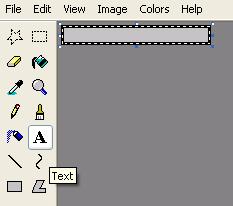
To add text, click the "A" icon on the left hand side.
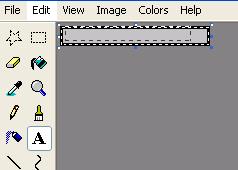
Drag the + shape over the page space, and unclick.
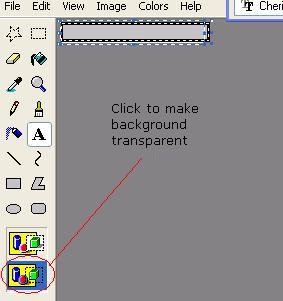
As shown, click the transparency icon.

Type the text you want to appear in your blinkie. The best size to start off with is 8 or 10.

Click the "select" tool as shown, and click and drag inside, but not over the short lines.

Choose Edit, then Copy.

Save the blinkie and open the second blinkie frame you made.
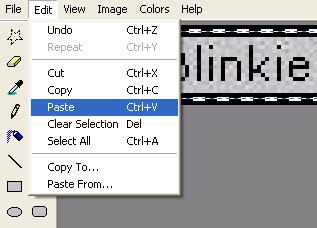
Paste what you have just copied into the second blinkie frame, to ensure your text is in the same place on both blinkies.

Save the second blinkie frame, and you've completed two frames! Well Done!