
Welcome to my blinkie tutorial! I hope that is of some use to you. I've tried to make it as easy as possible by doing it step by step and including illustrations. However, if you have any questions, please refer back to my homepage and contact me with any questions you have. I am happy to help you!
This tutorial is for those using Jasc Paint Shop Pro version 8
Firstly, open Paint Shop Pro, and create a new canvas by choosing File -> New, and setting the image dimensions to 150 width and 20 height, in units: pixels. Image Characteristics should be:
Raster Background
Color depth: 16 Million Colors (24 bit)
Color: Transparent should be ticked.
Now press OK.

Zoom in to 400% or higher, and fill the background in a color of your choice (by setting it as the foreground color on the right hand toolbar), using the Flood Fill Tool (F) on the left hand toolbar.
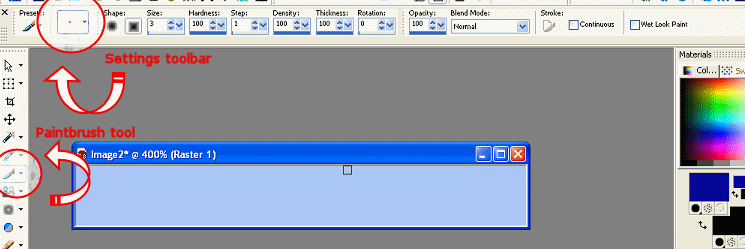
Next, choose the Paintbrush tool on the left hand toolbar, and change the settings as shown (shape is +square01). Then make a border, 3 pixels wide around the edge of your frame.
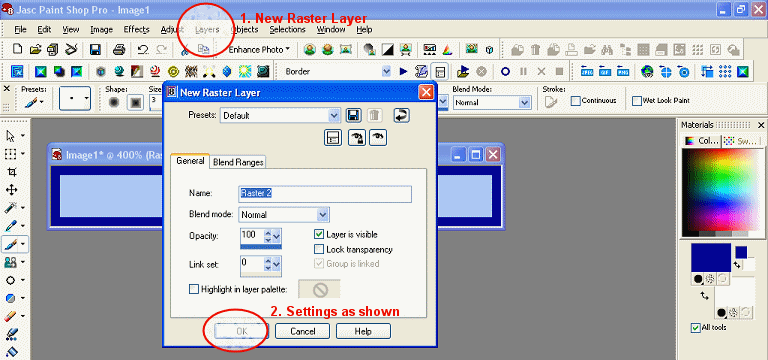
Next, create a new layer by hitting Layer -> New Raster Layer and choosing the settings as shown.
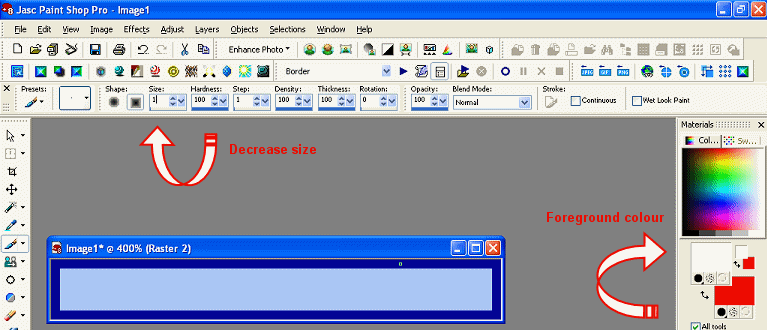
Now change the size of the paintbrush to one, and the colours in your palette on the right hand side to black and white. Carefully paint into the middle of the border, alternating black and white lines, 2 pixels in length with 1 pixel between each one.
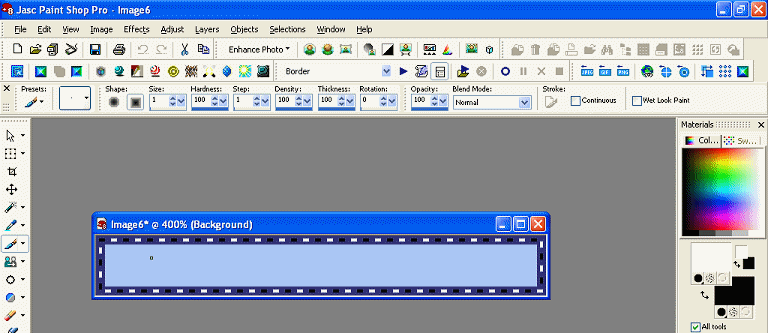
It should look something like shown above. When you are finished, save your blinkie frame as "Frame1" or similar, in .bmp format.
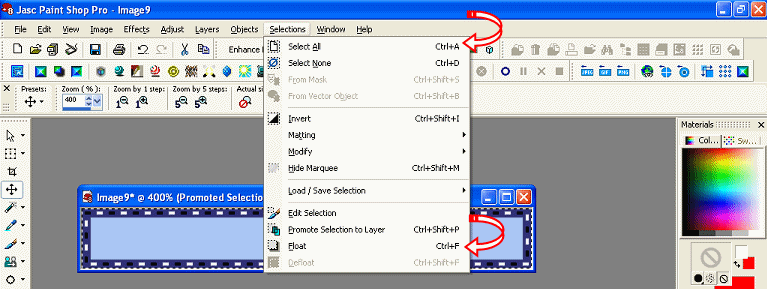
Select the blinks you have just drawn by hitting Selections -> Select All, then Selections -> Float, until you have marching ants around each blink.
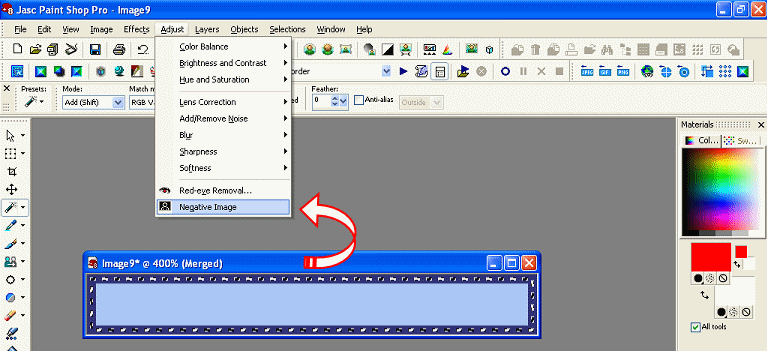
Now reverse the colours of your blinks, by hitting Adjust -> Negative Image.
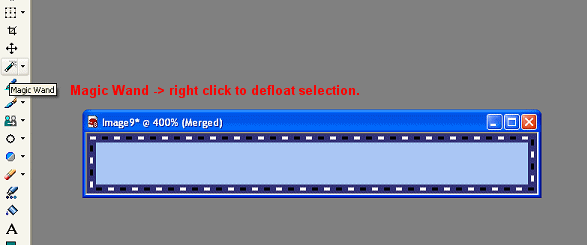
Defloat the selection by clicking the magic wand tool, and right click to deselect. Save the new blinkie frame as "Frame2" or similar, again, in .bmp format, and open up "Frame1" again, so you have both frames in your workplace.
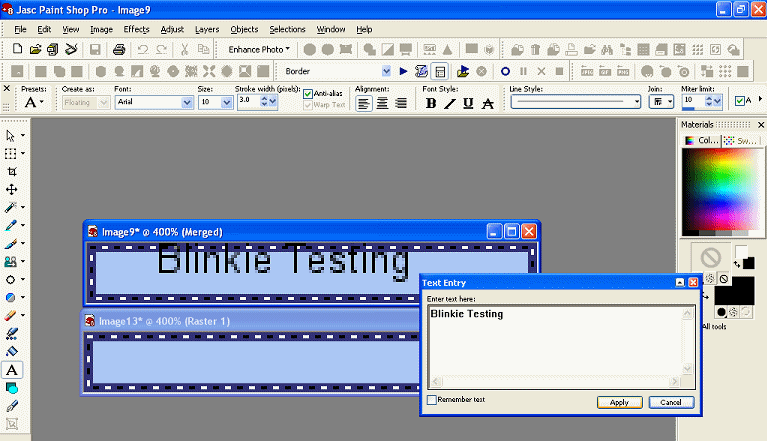
Now add the wording you would like to display, by clicking the "A", and left clicking anywhere on the blinkie frame, then typing the wording and clicking "Apply". Then drag your text to the centre of the blinkie frame, and deselect by right clicking.
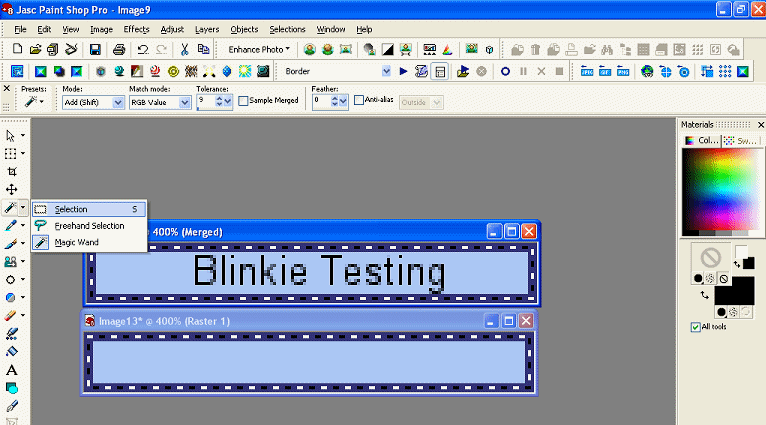
Now, choose the selection tool under the magic wand button, and click and drag to select the middle blinkie section, and 1 pixel's width of border (DO NOT select the blinks).
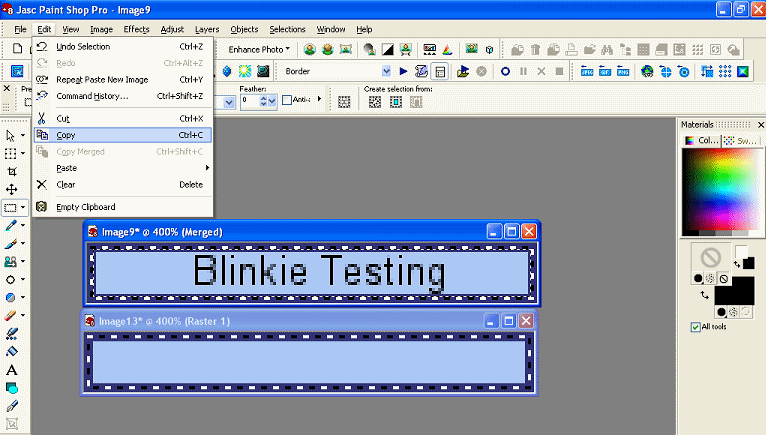
Edit -> Copy to copy the selection onto the canvas, then Edit -> Paste -> Paste as new layer onto the second blinkie frame, to ensure the text stays in the same place on both frames.
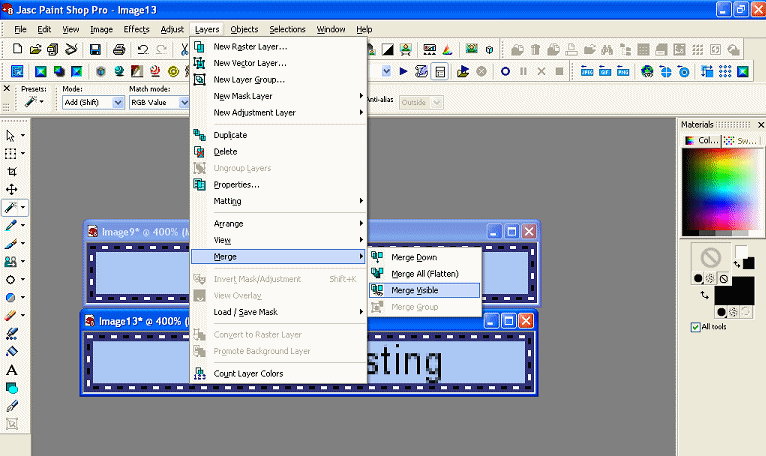
Now Merge the second blinkie frame by choosing Layers -> Merge -> Merge Visible, and save both frames with text, again as .bmp files.
The next step is to add these frames to an animation program to make them blink. You now have two options. If you have Jasc Animation Shop, click here for the second part of the tutorial. If you don't have an animation program, don't worry - you can download "Movies 12" from here and follow the second part of the tutorial here.
|
|