
Welcome to my glitter name tutorial! I hope that it is of some use to you. I've tried to make it as easy as possible by doing it step by step. However, if you have any questions, please refer back to my homepage and contact me with any questions you have. I am happy to help you! For this tutorial you will need Jasc Paint Shop Pro and Jasc Animation Shop both trials downloadable from www.jasc.com. Firstly, you need to find a glitter gif that you'd like to use, remembering to save it in .gif format. For this tutorial, I am using a glitter from Sparkelies. When you have one, open Jasc Animation Shop, by doing Start -> All Programs.
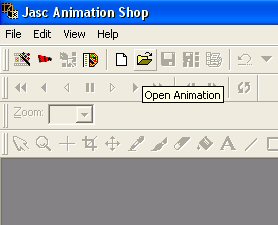
Firstly, click "Open Animation" and find where you saved your glitter. Open it to animation shop.
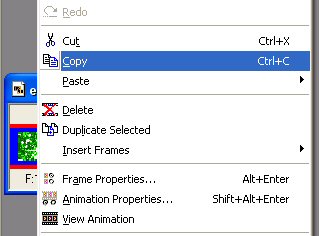
Next, right click on the first frame and choose "Copy".
Now open Paint Shop Pro, by choosing Start -> All Programs.
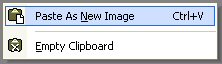
When Paint Shop Pro has loaded, right click, and choose "Paste as new image". Do this for all 3 glitter frames.
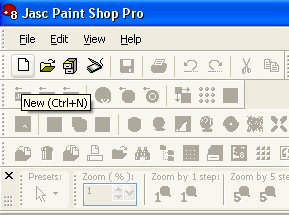
Open a new canvas by clicking the "Open" icon on the top toolbar.
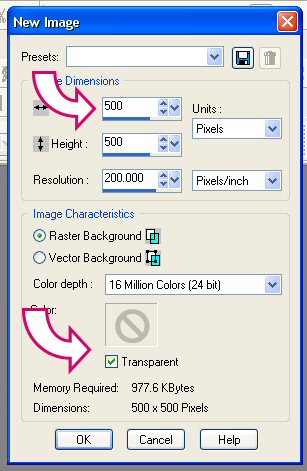
Make sure the settings are as above. Allow 500x500 pixels to make sure there is enough space, and that the background is transparent.
Next, select the "Text" tool from the left toolbar.
On the top toolbar, select your font and font size. It is better to use bolder fonts, and use a size between 30 and 48.
On the right hand side colour toolbar, make sure the outline colour is set to black, and the fill colour is set to transparent, using the marked buttons. Left click on your canvas, and type whatever you want to make into a glitter name, then click "Apply".
Move the text to a suitable place on the canvas, then choose the "Magic Wand" tool from the right hand toolbar, and right click to defloat it.
Next click the "Crop Tool" from the left hand toolbar.
Click and drag it, so that it fits neatly around the name. Then double click it to crop to size. Now save this as 'Image1'.
Next, choose the "Flood Fill" tool from the left hand tool bar.
Choose the "Pattern" option from the right hand color toolbar, as shown.

Click the box where the pattern is displayed, and the above will appear. Click the arrow to the side of the top left box and choose the first glitter frame from the options. Make sure it is showing up in the top left box, and click OK.
Now fill the letters with the glitter. After all the letters are filled, go to File -> Save as, and save as "name1" in .PNG format, so that the background will remain transparent. Now open "Image1", which you saved earlier on, and fill with the second frame of glitter, and save as "name2". Do this for all 3 glitter frames.
Now open Animation Shop again, and choose "Animation Wizard" from the top toolbar.
Make sure the first box looks like the one above, and click "Next".
Make sure the default canvas color is set to "Transparent" and click "Next".
Make sure your box looks like the one above, and click "Next".
Make sure the "Yes, repeat animation indefinately" box is checked, and choose a speed for your glitter. The lower the number, the faster your glitter will be. I recommend between 10 and 16.
Next, choose "Add Image".
Find all the frames, and click "Next" when you have them all as shown above.
Now choose "View Animation" from the top right hand side of the screen.

Make sure you save your name in .gif format, or it will not be animated.
This is what we made in this tutorial!

Have fun making your own!
|
|